Monday, March 3, 2014

Coconut Cream Pie - with Stabilized Whipped Cream!


If you don't like coconut, too bad. 

This pie is amazing, and there's no way that the rest of y'all should miss out. 

The first time I fell in love with coconut cream pie was when I was nannying in DC. The family had this outrageous recipe. It was simple. It was quick. It was DELICIOUS. It could be whipped up in an afternoon during nap time - unless you were brave and could handle sharing spatula licking duty. 

I had that recipe at one time. I swear I did. I remember asking specifically for it. AND NOW I'VE LOST IT. 

*Cue the symphony of tiny violins*

But I've found one that is nearly as good. I think. 

Quite frankly, I'm still in mourning. But The Bean's cuteness is helping cheer me up.


Don't you feel better? I know I do. 

And then I have a slice of pie....  


Mmmm. Pie. 

Start off with egg yolks, cream, coconut milk, sugar, cornstarch, and salt in a pot. Whisk really well to get everything nice and smooth. 


Put it on the heat and whisk CONSTANTLY until it thickens and boils.


Remove from heat. Stir in vanilla, coconut extract (optional), and tiny pulverized coconut (optional). If you want a super smooth pie - omit the pulverized coconut. If you don't want to spend $5.35 on a tiny bottle of coconut extract, omit the extract. Your pie will still taste delicious, if a little less coconutty. 


Pour in a baked pie shell. Refrigerate. 


I love this pie with real whipped cream mounded on top. The only problem is that real whipped cream - when it's just cream and sugar - is pretty unstable. It tends to loosen up after a few hours and makes a yucky mess on your pie. I usually wait until I see my guests' eyeballs before whipping up the cream. 

But, my friends, I have found a solution! It involves gelatin. The unflavored powdered kind. Trust me, I was skeptical. This a girl who has spent her entire life avoiding jello. Cause it's gross. Things that wobble like that just aren't meant for eating. 

But if you add unflavored powdered gelatin - just 3/4 of a tsp for 1.5 cups of whipped cream - you get beautiful whipped cream that TASTES LIKE WHIPPED CREAM and can stand up overnight. Really. Promise.


This may or may not have revolutionized my dessert making. 

Top your pie with your stabilized whipped cream and sprinkle on some toasted coconut. 


See if you can keep from eating it all before dinner. Oooof. 

Coconut Cream Pie
Adapted from Mel's Kitchen and Today's Mama

1 baked 9" pie crust (I use a Pillsbury one. No judgement here!)

For filling:
1 can coconut milk
~1 c heavy cream (you need 3 c. of liquid - coconut milk + cream)
1/3 c cornstarch
3 egg yolks
3/4 c sugar
1/4 tsp salt
1/2 tsp vanilla
1/2 tsp coconut extract (optional)
1/2 c unsweetened finely shredded coconut - I find this at my local Ranch 99 Asian market (optional)

For stabilized whipped cream:
1 1/2 c + 2 tbsp heavy cream
3/4 tsp unflavored powdered gelatin
1/3 c sugar
toasted coconut (about a 1/4 c. or more, if you like to snack on it....)

Bake off the pie shell, according to the instructions on the box - or the recipe. Whichever floats your boat. 

For filling:
Open the can of coconut milk and pour into large measuring cup. Add cream until you reach 3 cups. Separate your eggs - I crack the eggs into a bowl and then use my fingers to gently take out the yolks - and reserve whites for a later use. (Omelets anyone?) 

In a large pot, off the heat, whisk together the coconut milk, cream, cornstarch, egg yolks, sugar, and salt. Put pot on medium low heat and whisk constantly until mixture thickens and bubbles. Remove from heat, add vanilla, coconut extract (optional), and shredded coconut (optional). Pour into cooled baked pie shell. Refrigerate. 

For stabilized whipped cream:
In a small microwave-safe bowl, pour 3/4 tsp of unflavored powdered gelatin over 2 tbsp of heavy cream. Let sit 5 minutes to bloom. Put bowl in microwave for 20 seconds. Stir with fork until gelatin is melted into the cream. 

Whip 1 1/2 c of cream and sugar in a large bowl until soft peaks form. Drizzle in the cream/gelatin mixture and beat until you have stiff-ish peaks. Spoon onto top of pie and sprinkle with toasted coconut. Refrigerate!

-------

PS - So we ate this pie both the day I made it and the day after. It was better the next day! Not joking. We had friends over for pie (Who does that?? But we should all totally do that.), and they thought it was ridiculous. On day two. It cut perfectly and the whipped cream had gelled just a bit. 

This is my favorite pie ever. 

Why yes, I would like another slice.


Monday, February 17, 2014

Simple Roasted Carrot Soup


There are some days when you just need something simple and delicious. 

No "complex flavors". No needing polysyllabic adjectives to describe the taste. 

This soup has 4 ingredients, not counting salt, pepper, and olive oil. 

So if you're a novice cook, or just want to take a break from all that fancy stuff - this is your soup. 

Or if you're a busy mom and have zero time to come up with dinner and are looking to save a few bucks since someone seems to be going through diapers faster than you're going through Baileys.


Ahem. 

Back to the soup!

Carrots and onion, on a sheet pan. 


Drizzle olive oil over them and sprinkle with rosemary, salt, and pepper. 


Roast for an hour and 15 minutes. In a large pot, dump all your roasted veg into the boiling vegetable broth. 


Use a stick blender to blitz until you like the consistency. If you want a creamier soup, add cream (or almonds if you're vegan) and blitz until smooth. 


Serve with a little olive oil, salt, and pepper on top. And little bread soldiers. Cause while you didn't have time to clean the bathrooms, you did manage to find time to make bread.... Oy. Motherhood.


Simple Roasted Carrot Soup

1 2lb bag of baby carrots
1/2 red onion, quartered
1 tsp fresh rosemary
olive oil
salt
pepper
vegetable broth, chicken broth, or water (4-8 c)
cream or almonds if desired
bread for serving

Preheat oven to 375. On a large sheet tray, lay out carrots and onion quarters. Drizzle olive oil over the top. Sprinkle with salt and pepper - use plenty. Sprinkle on rosemary. Roast for an hour and 15 minutes. Remove from oven. 

In a large saucepan, bring 4 c. of your chosen liquid (vegetable stock, chicken stock, or water) to a boil. Add in the contents of the roasting pan. Allow to boil for 5 minutes. Use an immersion blender to puree. Or gently transfer to a blender and pulse until smooth. 

Taste the soup. Add more salt and pepper if needed. If you want it creamier, add cream or almonds and blitz again. 

Serve with a few drops of olive oil and more salt and pepper. And some bread. Delicious!


Tuesday, February 4, 2014

Orange Marmalade Jelly


*coooooough* *hack* *SNEEZE* 

It's been a mighty sick few weeks around here. First, The Bean caught something at day care. She was sick for 2 and half weeks. Then she gave it to me. I am still sick and have passed it on to Mr. S. We're quite a sight now, let me assure you. The cough drop wrappers are almost visible from the windows. 

But before then - before the plague came upon us - we made marmalade. 

Well. It was supposed to be marmalade. Having never made marmalade before, we let it go a hair to long and it became jelly. Not that I'm complaining. The thicker it is, the higher you can pile it. 

Perhaps I should crack open a jar right now and pile it high on a piece of toast. Oranges are supposed to help cure colds, right?

And why did we make marmalade? 


Well, our tree got ripe!


Mr. S is taken ladies. This orange picker belongs to moi. *Miss Piggy hair toss*

Once we got the beautiful oranges (and a few lemons too),


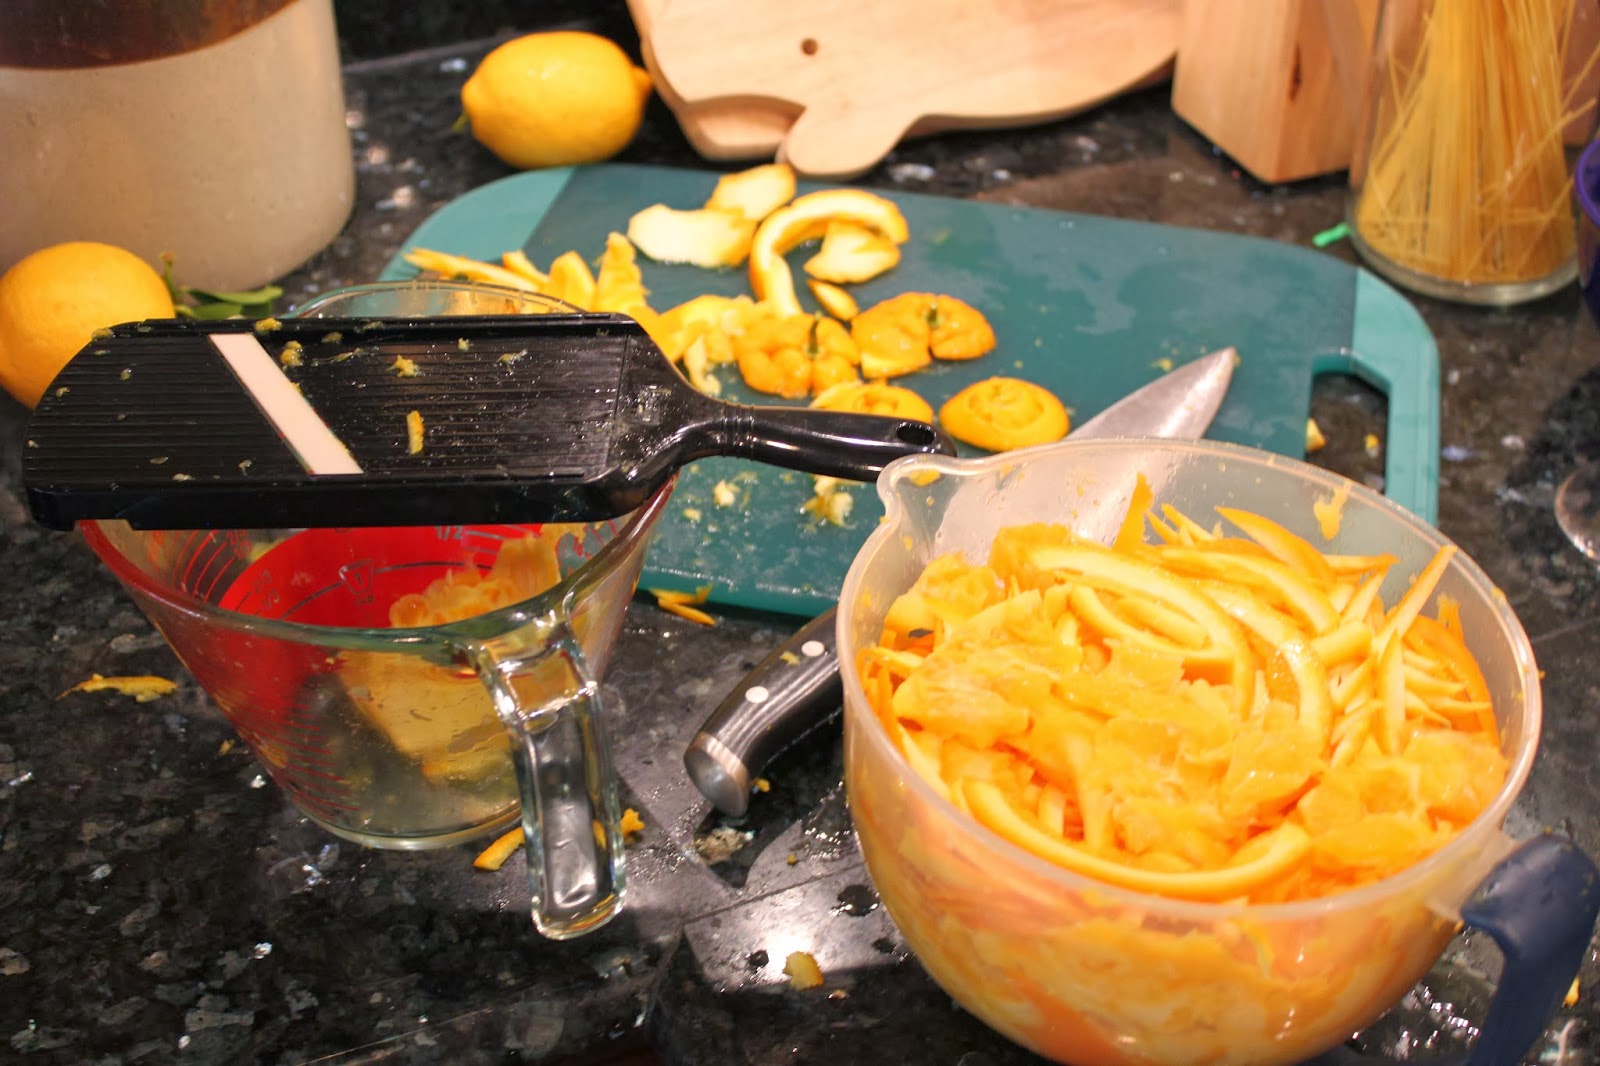
There was slicing to be done. Use a mandolin, with a safety glove, and the work goes much faster. 


Into the pot they go, with a bit of water, for a 5 minute simmer. Then they sit overnight. That's when the magic elves make merry in the jam pot. 


The next day, back up to a boil and add a ton of sugar. Well, just cup for cup of your orange mixture. Still a lot of sugar. 


After that, it boils again. Just to the point where it's almost jelly. Remove from the heat quickly.


Pour into cleaned and boiled glass jam jars. 


Secure the lids to finger-tip tight and then process (aka, put in a pot of boiling water for 10 minutes).


They are now ready to sit on the shelves of your friends and family until devoured. Refrigerate after opening, of course. 


Orange Marmalade Jelly
From the Ball Blue Book guide to preserving

5 medium-large oranges
2 lemons
1 1/2 qts water
white sugar (buy a big bag)
12 glass jelly jars with lids

Wash the oranges and lemons. Using a mandolin, slice the oranges and lemons into thin slices, removing seeds as you go. Place fruit into a large stew pot and add 1 1/2 quarts of water. Simmer for 5 minutes. Cover, and let sit overnight. The next day, bring to a boil and cook until peel is tender. Measure out the fruit/liquid. Add 1 cup of sugar for every cup of fruit stuff. All goes back in the pot and gets well stirred. Bring to a boil over high heat and stir constantly. Cook until almost at the gelling point (gelling point is 8 degrees above boiling, so you're looking for 6 degrees) or to the gelling point if you like a more jelly-like spread. Remove from heat and ladle into hot, just boiled jars. Screw lids on to finger tight and then process in boiling water for 10 minutes to secure the lids. 

Gratuitous Bean Photo!


Tuesday, January 21, 2014

Tuesday


Days seem longer when it's just me and the Bean. Eat, sleep, smile, play. Repeat. Oh darling girl. How I can't wait to do it all again with you.

Sunday, January 19, 2014

Hidden Vegetable Meatballs


If you have little ones, or remember being a little one yourself, you know vegetable consumption can be a difficult subject. 

We aren't yet to the "I have an opinion about what I eat" stage with The Bean, but I'm starting to prepare for that eventuality. Which means I'm starting to practice sneaking veggies into the meals that Mr. S and I eat. 

Much to his chagrin. 

He'd happily eat his weight in carrot sticks, kale, spinach, brussels sprouts, and salad greens. He's even recently learned to appreciate cauliflower and asparagus (we roast them). The only veggies he still won't touch are green beans. Everyone has one, I suppose. 

In any case. I've now figured out the easiest way to add veggies to almost any non-veggie main dish we make. It involves this glorious machine:


Using that funny looking circle bladey thing that typically resides at the far back of the cupboard, veggies go from large, "I am not going to eat that" chunks to slivered bits of undetectable nutrition. 


Triumph!

And speaking of triumphs, we've made a few house improvements. A towel bar over the sink in the kitchen and cafe curtains across the front window. The difference those little things make is huge.


Also, The Bean has now joined the Exersaucer set. She loves it. And we love that she loves it. And it lets us all have a bit more time to breathe slowly.


Now to the meatballs into which we will be sneaking our veggies:

Start off with 1 small onion, shredded with the food processor's circle blade.  Saute in olive oil in a large oven-proof pan until slightly golden. If you don't have an oven-proof pan you can use any old pan but you'll need 2 glass baking dishes later. 


Add in garlic, chopped, and the shredded carrots and mushrooms that you put through your food processor. 


Add butter. Cook down until all the water is gone from the mushrooms, about 5 minutes. 


Toss the veggies into a large bowl. Allow to cool. 


Add meat and bread crumbs. Toss around. 


Add salt, pepper, Italian seasoning (or your herb of choice), and eggs. 


Mix it all up lightly with your hands. Dig in there. 


Roll into balls. I like mine golf-ball sized. You could go for baseballs if you like, just bake them longer. 
Use that oven-proof pan again (I didn't even wash mine). Add olive oil and brown off the meat balls. 


Turn them once you see brown rise up about 1/2 way on the meatballs.


 Let cook for another few minutes and then pour over a jar of store-bought marinara sauce. 


Bake in the oven for 15 minutes. Remove from oven and toss the balls around to wake up the sauce. Cover with parmesan cheese. 


Eat over pasta. 


Or place in containers to eat for lunch during the week. Mmmmm. Meatball sandwiches. 


Hidden Vegetable Meatballs

makes ~60 meatballs

1 small onion, shredded in food processor
olive oil
5-6 cloves garlic, diced
2 c shredded carrots (spout of food processor filled up twice)
2 c shredded mushrooms
2 tbsp butter
2 1/2 lbs ground beef
1 1/2 c bread crumbs
3 eggs
2 tsp salt
pepper to taste
2 tsp Italian seasoning or other herb
2 jars marinara sauce

In a large oven-proof skillet, saute shredded onion in a few glugs of olive oil. Let cook to a golden color. Add in garlic, mushrooms, carrots, and butter. Cook for 5 minutes, until water is released from mushrooms and cooked off.

Dump vegetables in a large bowl. Allow to cool (10-15 minutes). Add in ground beef and bread crumbs. Toss lightly. Add in salt, pepper, herbs, and eggs. Mix with hands until unified. Form into balls. 

Add a bit more oil to your pan and brown off the meatballs over medium heat. When they have a brown color about halfway up, turn them over. Allow to brown for another several minutes. Transfer to a glass baking dish and cover with marinara, or cover with marinara in your oven-proof skillet. Brown up the next batch in a second skillet. Cover with marinara. 

Cover with foil and toss the skillets or pans into a 350 degree oven for 15-20 minutes. Remove from oven, top with parmesan, and serve over pasta or on a sandwich. Or on a fork. No judgement.