It's actually pretty chilly in Texas right now. Good thing I'm headed to Mexico.
A cold front moved in right before Christmas, and it's now chilly enough to have the fireplace at a low roar.
Thank goodness.
There's nothing I love more than a chilly day and a hearty meal. Especially when I've got a head cold the size of an elephant.
For some reason, when I have a cold I just want to stuff my face with carbs - ok, fine. Even when I don't have a head cold I want to stuff my face with carbs.
But at least with a cold I can sorta justify it. (And it just took me 3 beats to think of the word justify - so I know that my cold is in full swing. Come on brain!!).
This sickness better disappear tomorrow! I've got a taco tour booked on Saturday and Lord help me if some cold thinks it's gonna slow me down.
Back to the carbs. What better carbs than pasta? And what is the most carb-filled pasta on the planet? That which has not only regular flour but potato too?
Why, delicious gnocchi!
Some gnocchi is heavy and gummy and chewy. Not this stuff. It's a soft pillow of pasta, perfect for saucing with pesto. Or tomato sauce. Or any kind of sauce, really.
Yay! Pasta! I'll have this cold kicked in no time.
Start with potatoes. Boil them.
Then run them through a ricer or a food mill.
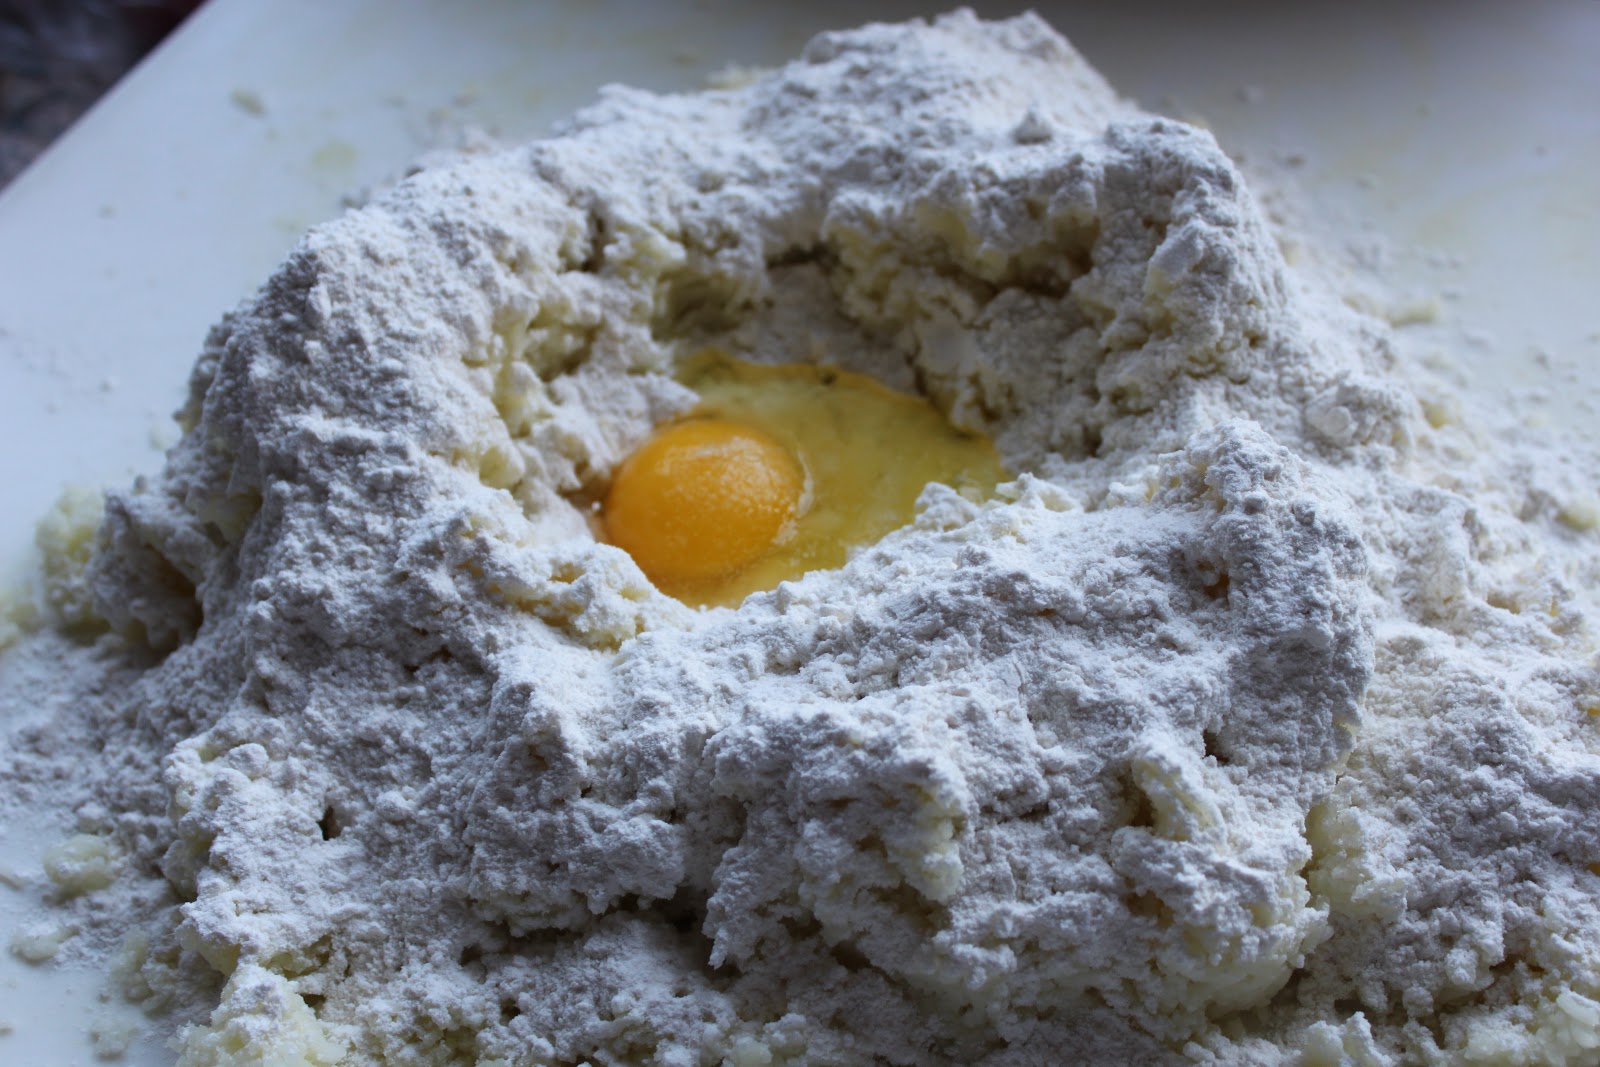
Next up, make a well in your potato tower.
Sprinkle the whole thing with flour and crack an egg in the middle. Add a bit of salt.
Very briskly and gently work it together into a ball. Knead until smooth and not sticky. (Work in a sprinkle of flour at a time if it's still sticky)
Hack off a small ball. Roll into a long rope.
Cut the rope into little ~1" bits.
Roll the bits over the tines of a fork (you're creating ridges on one side and a dimple on the other so that the sauce can stick in the crevices).
Toss the gnocchi in boiling water for a minute or so until they float.
Immediately transfer to a bowl full of ice water (you're shocking them to stop the cooking process).
Once the gnocchi are all cooked and in the ice bath, drain them. Toss them in a pan and coat them with vegetable oil. They can sit covered in the fridge for 48 hours before you use them.
To prepare a gnocchi dish, sautee the cooked gnocchi in a little bit of olive oil and toss in the pasta sauce. You're just browning their bottoms and warming them up.
I typically sauce with pesto, but any pasta sauce of your choice (meat or no meat) will work beautifully.
Gnocchi
Barely adapted from Mario Batali
3 large potatoes (about 3 lbs)
2 1/2 c. flour (may need more, depending)
1 egg
1/2 tsp salt
Boil the potatoes whole, until soft (45 minutes to an hour). Drain and peel. Run through a ricer or food mill to achieve finely ground potatoes. Mound into a small mountain. Make a well in the middle of the mountain.
Sprinkle 2 c. flour over the potatoes. Crack the egg into the well and sprinkle with salt. Use a fork to blend the egg into the flour and potatoes. Once the egg gets blended in, use your hands to knead the dough. Knead gently for 4 minutes, until ball is dry. Sprinkle more flour as needed.
Pinch off a smallish ball. Roll into a long rope, about a 1/2" in diameter. Cut into ~1" bits. Roll the little bit on the tines of a fork to get ribs on the back and a dimple (from where your finger was) in the front.
Boil the gnocchi for a minute or so, until they float. Remove from boiling water and dump into a big bowl of ice water. Work in batches until all gnocchi are in the ice bath.
Drain the gnocchi and place in a large dish. Toss and coat in vegetable oil. Cover and refrigerate until ready to use (up to 48 hours).
When ready for dinner, sautee gnocchi in a bit of olive oil until warmed through and slightly golden on one side. Toss in sauce. Serve!
Merry Day After Christmas! Or Boxing Day as it's known in the UK.
I think here in the states it is unofficially known as Stand-In-Line Day. Most of us still have family in town (or are the family that's in town) and have managed to gift the wrong color sweater, the wrong DVD in the trilogy, or the wrong book in the series.
Welcome to the return line.
This year, I've opted to give only gifts that can't be returned. Thus saving my family countless hours of selfloathing and depression.
So, instead of spending hours standing in line - spend hours standing in the kitchen! It's much more pleasant there.
And there's eggnog.
Mmmm. Eggnog.
But back to the kitchen - tamales are great to make when you've got a billion extra people in the house. You'll need everyone's help to get them done (especially when you're each on your 4th glass of petite syrah).
Tamales are traditional festive food in the Latin American community. There are even folks out there who do nothing but make tamales - NPR just interviewed one.
But they are pretty easy to make at home. They just take all day and use all the pots you own. No biggie.
You'll need to find a Latin American/Mexican grocery store, as some of the things you need can only really be found there.
Mind you, there are a million recipes out there for tamales - this is just a basic one. A good one. A "I-will-be-eating-2-dozen-of-these" one.
It makes about 100, or, 1 bag of corn husks - however many that is.
Get:
1 bag of dried corn husks
1 - 5lb bag of masa for tamales (it comes pre-mixed, but we'll be adding to it)
1 package of dried ancho chiles
1 - 6-7lb hunk of pork shoulder
1 - 28 oz container of manteca de puerco (pork fat)
1 massive tamale steaming pot
The pork needs to be covered with a rub (recipe below), wrapped in aluminum foil, and cooked at 195 degrees for 13 hours. So, start it after dinner and let it run all night. It will practically fall off the bone when done.
Dad's Basic Pork Rub:
1/4 c. paprika
1/2 c. brown sugar
3 tbsp. coarse ground black pepper
1/2 tbsp salt
1 1/2 tbsp onion powder
2 tsp garlic powder
2 tsp cumin
1 tsp cayenne pepper
1/2 tsp Tony Chachere's cajun seasoning
1 tsp cinnamon
Once the pork is done, be sure to get out a glass container (or large cup) and save all the juices/fat that ran out of the meat.
You'll need it later.
In the morning, take the corn husks out of the bag and go through them. Any with an excess of brown hair/strings on them, toss out. Let them soak in a big pot of water for several hours.
Put a big ziplock full of water on the top to weigh them down. That way all the husk is in the water.
Take the anchos out of the package, break off the tops, and remove the seeds. Put the dried ancho chiles in a big pot of hot water. Let them steep (like tea) for several hours.
Once they're soft, put them in a food processor and blitz the heck out of them, adding more water as needed until you get a soupy mixture. Add in some garlic powder, salt, cumin, and black pepper - to taste.
Take the pre-mixed masa and add just under 1/2 the ancho pepper mix (all this is to taste - if you like less chile, add less chile). Also toss in 1 container of manteca and a good sprinkling of baking powder (~1 1/2 tbsp, I think). Some more salt, garlic powder, and 1/2 the glass jar of pork juices.
Squeench the masa mix through your fingers, until all the little lumps have been squeezed out.
It takes awhile. Rotate squeenchers and keep squeenching.
While the squeenching is happening, someone else needs to be chopping up the pork. Some people even grind it in a food processor. We just chop it up real fine.
Toss in the other half or so of the ancho pepper soup and the other half of the pork juices. Mix it up good.
Once you've got everything ready, drain the corn husks. Set yourselves up on the largest table in the house: big bowl of meat, big bowl of masa, big pile of husks, and a large empty pan. And lots of spoons.
To roll the tamales, take a corn husk. Use your fingers to determine which side is smoother (has less prominent ridges). Put the smooth side up. Spoon about a tablespoon - or a bit more - onto the corn husk. Use the spoon to flatten it out, 1 inch from the top, and a few inches from the tapered ended bottom, in a ~3" wide rectangle.
Top with the amount of meat you like in your tamales (we used a hefty spoonful).
Pick up the edges of the husks and join your masa rectangle's edges together. Roll the husk over.
Take the tapered end and fold it up. You're done!
Now make 50 more.
Once you've got a quorum of finished tamales, let them steam for 45 minutes to an hour in a massive pot with a massive steamer insert.
Remove from pot with tongs. Place on platter.
When ready to eat, discard husks. Eat with green sauce, red sauce, avocado, whatever your heart desires.
Happy holidays!
Happy Christmas - from the Miller home in Houston
It's that time of year! Holly. Ivy. Caroling. Funny pointed hats. Mountains of green and red food.
Watching old movies and trying to determine the perfect spot for your favorite ornament on the tree.
Glass of eggnog anyone?
Most of us are so busy preparing for the holidays, we completely forget those who have a birthday this time of year!
Several lovely co-workers of mine had birthdays recently. In an attempt to make something as un-holiday as possible - I made a cheesecake.
I used the famous recipe that my mother has been using for years. One that garnered her much adoration from bake sale purchasers everywhere. In fact, this cheesecake went for $120 once in a youth ministry bakesale.
Needless to say, it's worth every penny.
Start with gram cracker crumbs and ground walnuts.
Combine and drizzle with melted butter. Then pack into the bottom of a well-buttered 9" or 10" spring form pan. Set aside.
Next up, room temperature cream cheese. And I mean room temperature. Let it soften on the counter for several hours.
Beat it until it's nice and smooth. No lumps. Then add in the eggs, sugar, lemon juice, and vanilla.
Beat until super smooth - see a trend here? Smooth batter = smooth cheesecake. No one like lumps in their cheesecake.
Pour over crust. Bake for 60-75 minutes, until puffed up and probably cracked on top. (That's why we make a topping for it).
Once cooked, remove from oven and let rest 15 minutes. Don't turn off the oven yet!
In a medium bowl, mix sour cream, sugar and vanilla together (you can do this while the cake is baking, just keep it in the fridge once mixed).
Spread over the cheesecake - leaving a 1/2"-1/4" border edge of cheesecake showing.
I mean it. Leave a border. Put back in oven and bake for 10 minutes. Remove from oven and let rest on the counter for an hour. Then refrigerate for 24-48 hours before serving. It's worth the wait.
I serve mine with blackberries on top. Happy un-holiday!
Momma Jeanne's Cheesecake
Reprinted from the Crane Family Recipes from the Hoosier Heartland cookbook
Crust:
3/4 c. coarsely ground walnuts (3oz)
3/4 c. finely crushed graham crackers
3 T. melted butter
Combine walnuts, crackers, butter, and press into the bottom of a buttered 9 or 10 inch springform pan.
Filling:
4 - 8oz pkgs. cream cheese - room temperature
4 eggs
1 1/4 c. sugar
1 T. fresh lemon juice
2 t. vanilla
Beat cream cheese in a large bowl until smooth. Add remaining ingredients and beat very well. Spoon over crust. Bake 60 to 75 minutes depending on pan size. (Megan's note: my 9" took closer to 80 minutes) May rise and crack, topping will cover it. Remove from oven and let stand 15 minutes. Retain oven temperature.
Topping:
2 c. sour cream
1/4 c. sugar
1 t. vanilla
Combine while cake is baking. Cover and refrigerate. Spoon over baked cake and spread to within 1/2 inch of edge. Bake 5 to 10 minutes until set. Refrigerate 24 to 48 hours before serving.
Preparation time: 2 hours 15 minutes
Temperature: 350 degrees